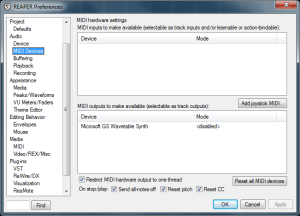
So first let us set up Reaper to recognise the gamepad. Plug the gamepad in and Windows should immediately recognise this as a joystick or game controller. Then start up Reaper.
Open the preferences window (Options -> Preferences, or ctrl-P) and select “MIDI devices” on the left hand side of the window.

Next click on the “Add joysick MIDI” button on the right hand side.

Select your Galy USB Joystick from the “Device” dropdown box
Select “Generic.txt” in the “Processing script” dropdown.
Ensure that the “Send as MIDI control/learn” option is checked.
That is your controller set up in Reaper. Now we need to use it to trigger Reaper to do something.
Fire up the Actions window (Options -> Actions, or just press the “?” key)
Find the action you want to trigger in the list. In this example I’m going to choose the “Toggle arm/disarm for the last touched track”.

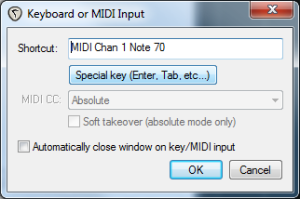
Then click the “Add” button, to create the shortcut for the selected action, which brings up this window.
Then press the button on the gamepad, joystick or, in my case footswitch, that you want to assign to this action and you’ll see this selected in the shortcut name, thus,

Click OK and you’re done. Find the other actions and assign to the other controller buttons as required. Job done.
